
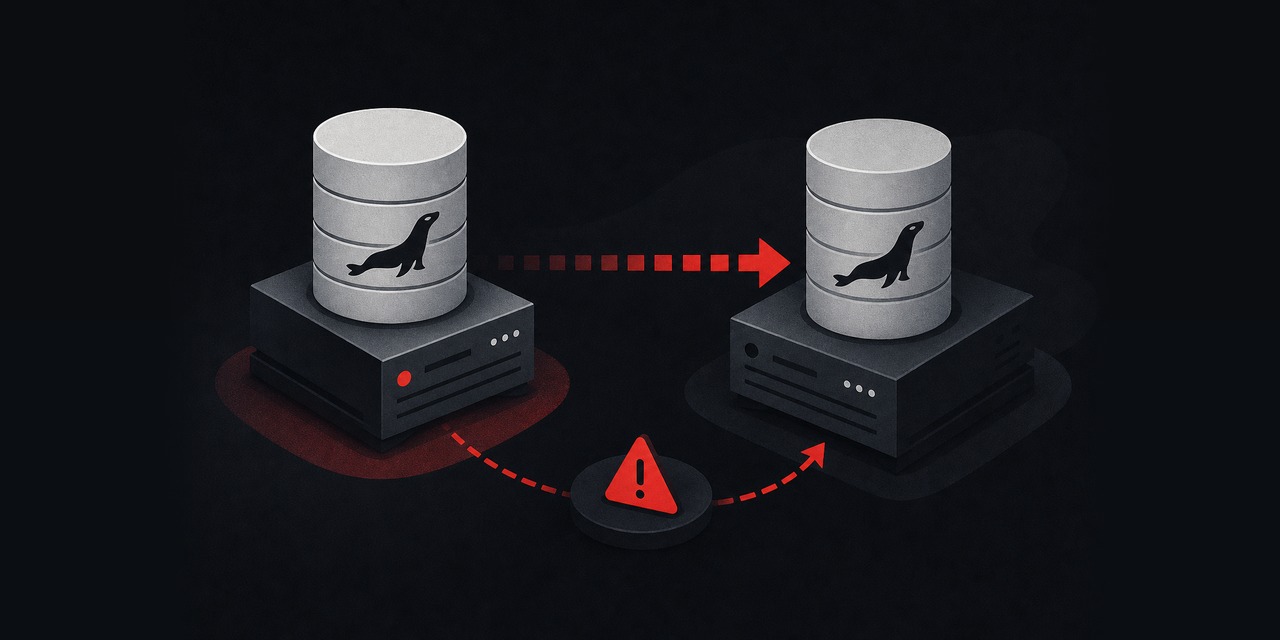
A replica you never test is only a comforting idea. This walkthrough shows how to set up MariaDB replication between two VPS nodes using TLS. You’ll verify the replica stays read-only and practice a promotion runbook, so you’re not improvising during an outage.
The examples assume your app depends on MariaDB (WordPress, WooCommerce, Laravel, Magento, or something custom). You’ll end with one primary for writes and one replica for reads or hot standby.
Failover stays manual on purpose. “Automatic” failover without fencing is a common cause of split-brain and conflicting data.
What you’ll build (and what you need)
- Two servers: Primary DB VPS + Replica DB VPS (separate instances).
- Replication over TLS: MariaDB replication user authenticates with SSL; traffic is encrypted.
- Replica stays read-only: enforced at runtime and checked with a simple verification routine.
- Promotion runbook: exact commands to promote the replica safely.
Recommended sizing: For most small-to-medium sites, start at 2 vCPU / 4–8 GB RAM / NVMe. If the database is already your bottleneck, size up early.
Or move to a dedicated DB tier on a managed VPS hosting plan so backups, monitoring, and patching don’t become “someday” tasks.
OS: Ubuntu 24.04/26.04 LTS, Debian 12/13, AlmaLinux 9/10, Rocky Linux 9/10 are all fine in 2026. The commands below call out Debian/Ubuntu vs. RHEL-family paths where they differ.
Network and DNS layout (don’t skip this)
Keep replication traffic private. If your provider offers private networking, use it.
If you must use public IPs, lock down TCP 3306 so only the replica can reach the primary.
- Primary:
db1(example IP:10.10.0.11or public IP) - Replica:
db2(example IP:10.10.0.12or public IP) - App: ideally connects to a DNS name like
db-primary.example.com(you will repoint it during failover).
If you don’t already have a dedicated hostname for the primary, add one now. During an incident, a DNS change beats hunting through app configs under pressure.
If you manage domains with HostMyCode, using domains and DNS makes the cutover quick and consistent.
Step 1: Install MariaDB on both VPS nodes
Pick a supported MariaDB series and keep it identical on both servers. In 2026, MariaDB 11.4 LTS is commonly available in many repos. Still, confirm what your distro ships.
For the cleanest replication behavior, run the same major series on both nodes (11.x with 11.x).
Ubuntu/Debian
sudo apt update
sudo apt -y install mariadb-server mariadb-client
AlmaLinux/Rocky (RHEL-family)
sudo dnf -y install mariadb-server mariadbsudo systemctl enable --now mariadbOn both nodes, run the hardening wizard:
sudo mysql_secure_installation- Set a strong root password.
- Remove anonymous users.
- Disallow remote root login.
- Remove test DB.
Verify:
sudo mysql -uroot -p -e "SELECT VERSION();"Step 2: Configure server IDs, binlogs, and safe defaults
Replication depends on binary logs (binlogs) on the primary. You also want a few boring-but-helpful defaults, so failover doesn’t surprise you later.
Find your MariaDB config file:
- Ubuntu/Debian:
/etc/mysql/mariadb.conf.d/50-server.cnf - Alma/Rocky:
/etc/my.cnf.d/mariadb-server.cnf(or/etc/my.cnf)
Primary (db1) config
Edit the server config and add/confirm these settings under [mysqld]:
[mysqld]
bind-address=0.0.0.0
server_id=1
log_bin=mariadb-bin
binlog_format=ROW
binlog_row_image=FULL
expire_logs_days=7
sync_binlog=1
innodb_flush_log_at_trx_commit=1

# Good hygiene
skip_name_resolve=1
Notes: ROW binlogs are a safer default for modern apps. They also avoid statement-based edge cases.
sync_binlog=1 and innodb_flush_log_at_trx_commit=1 prioritize durability. If you tune for speed later, do it knowingly and measure the trade-offs.
Replica (db2) config
On the replica, use a different server ID and enable relay logs. Add/confirm under [mysqld]:
[mysqld]
bind-address=0.0.0.0
server_id=2
relay_log=mariadb-relay-bin
read_only=ON
super_read_only=ON
skip_name_resolve=1
Restart MariaDB on both nodes:
sudo systemctl restart mariadbVerify the critical bits:
sudo mysql -uroot -p -e "SHOW VARIABLES LIKE 'server_id'; SHOW VARIABLES LIKE 'log_bin'; SHOW VARIABLES LIKE 'binlog_format';"Step 3: Lock down port 3306 with a firewall rule
If 3306 is reachable from the public internet, scanners will find it. Even with strong passwords, you’ll collect risk and noise for no benefit.
UFW (Ubuntu/Debian)
On the primary (db1), allow 3306 only from the replica’s IP:
sudo ufw allow from 10.10.0.12 to any port 3306 proto tcp
sudo ufw enable
sudo ufw status verbose
firewalld (Alma/Rocky)
sudo firewall-cmd --permanent --add-rich-rule='rule family="ipv4" source address="10.10.0.12" port protocol="tcp" port="3306" accept'
sudo firewall-cmd --permanent --add-port=22/tcp
sudo firewall-cmd --reload
sudo firewall-cmd --list-all
Verify from the replica:
nc -vz 10.10.0.11 3306Step 4: Create TLS certificates for replication (CA + server + client)
MariaDB can encrypt replication over TLS. You’ll create a small private CA.
Then you’ll issue a server cert (for db1) and a client cert (used by the replica when it connects as the replication user).
Create a working directory on your admin machine or on db1 (keep the CA key private):
sudo mkdir -p /root/mariadb-tls
cd /root/mariadb-tls
Generate a CA
openssl genrsa -out ca.key 4096
openssl req -x509 -new -nodes -key ca.key -sha256 -days 3650 -out ca.crt \
  -subj "/C=US/ST=State/L=City/O=HostMyCode-DB/CN=HostMyCode-DB-CA"
Create a server certificate for db1
Replace db1.example.com with a real hostname (recommended) or IP SAN.
openssl genrsa -out db1.key 4096
openssl req -new -key db1.key -out db1.csr -subj "/CN=db1.example.com"

cat > db1.ext <<'EOF'
subjectAltName=DNS:db1.example.com,IP:10.10.0.11
extendedKeyUsage=serverAuth
EOF

openssl x509 -req -in db1.csr -CA ca.crt -CAkey ca.key -CAcreateserial \
  -out db1.crt -days 825 -sha256 -extfile db1.ext
Create a client certificate for the replica
openssl genrsa -out repl-client.key 4096
openssl req -new -key repl-client.key -out repl-client.csr -subj "/CN=repl-client"

cat > repl-client.ext <<'EOF'
extendedKeyUsage=clientAuth
EOF

openssl x509 -req -in repl-client.csr -CA ca.crt -CAkey ca.key -CAcreateserial \
  -out repl-client.crt -days 825 -sha256 -extfile repl-client.ext
Install certs on db1 (primary)
sudo install -d -m 0750 /etc/mysql/tls
sudo install -m 0644 ca.crt /etc/mysql/tls/ca.crt
sudo install -m 0644 db1.crt /etc/mysql/tls/server.crt
sudo install -m 0600 db1.key /etc/mysql/tls/server.key
sudo chown -R mysql:mysql /etc/mysql/tls
Edit db1 MariaDB config under [mysqld]:
ssl_ca=/etc/mysql/tls/ca.crt
ssl_cert=/etc/mysql/tls/server.crt
ssl_key=/etc/mysql/tls/server.key
require_secure_transport=ON
Restart and confirm TLS is enabled:
sudo systemctl restart mariadb
sudo mysql -uroot -p -e "SHOW VARIABLES LIKE 'have_ssl'; SHOW VARIABLES LIKE 'require_secure_transport';"
Install certs on db2 (replica)
sudo install -d -m 0750 /etc/mysql/tls
sudo install -m 0644 ca.crt /etc/mysql/tls/ca.crt
sudo install -m 0644 repl-client.crt /etc/mysql/tls/client.crt
sudo install -m 0600 repl-client.key /etc/mysql/tls/client.key
sudo chown -R mysql:mysql /etc/mysql/tls
On db2, add to config under [mariadb] (client section) so the mysql client can use TLS too, which helps debugging:
[mariadb]
ssl-ca=/etc/mysql/tls/ca.crt
ssl-cert=/etc/mysql/tls/client.crt
ssl-key=/etc/mysql/tls/client.key
Restart db2:
sudo systemctl restart mariadbStep 5: Create the replication user (TLS required)
On the primary (db1), create a dedicated replication user and restrict it to the replica’s IP. Generate a long random password and store it in your secret manager.
sudo mysql -uroot -pCREATE USER 'repl'@'10.10.0.12' IDENTIFIED BY 'REPLACE_WITH_STRONG_PASSWORD' REQUIRE SSL;
GRANT REPLICATION SLAVE ON *.* TO 'repl'@'10.10.0.12';
FLUSH PRIVILEGES;
QUIT;Verify the user exists:
sudo mysql -uroot -p -e "SELECT User,Host,ssl_type FROM mysql.user WHERE User='repl';"Step 6: Take a consistent snapshot and seed the replica
Replication needs two things to start cleanly: an initial data copy and a binlog position.
For most teams, the most predictable approach is a logical dump with mariadb-dump that includes master coordinates.
If your dataset is massive, you’ll likely switch to physical backup tooling. First, get the full workflow working. Then optimize seeding after you’ve tested failover end-to-end.
On db1: dump with master coordinates
sudo mariadb-dump -uroot -p \
  --all-databases \
  --single-transaction \
  --routines --events --triggers \
  --master-data=2 \
  --set-gtid-purged=OFF \
  | gzip -1 > /root/db-seed.sql.gz
Check the dump includes binlog coordinates:
zgrep -m1 -n "CHANGE MASTER" /root/db-seed.sql.gzCopy to db2 and import
scp /root/db-seed.sql.gz root@10.10.0.12:/root/On db2:
gunzip -c /root/db-seed.sql.gz | sudo mysql -uroot -pCommon mistake: starting the import without enough free space in /var/lib/mysql.
Before you load the dump, check:
df -h
sudo du -sh /var/lib/mysql
Step 7: Configure replication on the replica (TLS + read-only)
Now you’ll point db2 at db1 and start the replication threads.
On db2, open a MariaDB shell:
sudo mysql -uroot -pFirst, stop/reset any old replication config (safe on a fresh replica):
STOP SLAVE;
RESET SLAVE ALL;
Extract the binlog file/position from the dump. In the dump you’ll see a commented line like:
-- CHANGE MASTER TO MASTER_LOG_FILE='mariadb-bin.000001', MASTER_LOG_POS=12345;Use those values in CHANGE MASTER TO. Example:
CHANGE MASTER TO
  MASTER_HOST='10.10.0.11',
  MASTER_USER='repl',
  MASTER_PASSWORD='REPLACE_WITH_STRONG_PASSWORD',
  MASTER_PORT=3306,
  MASTER_LOG_FILE='mariadb-bin.000001',
  MASTER_LOG_POS=12345,
  MASTER_SSL=1,
  MASTER_SSL_CA='/etc/mysql/tls/ca.crt',
  MASTER_SSL_CERT='/etc/mysql/tls/client.crt',
  MASTER_SSL_KEY='/etc/mysql/tls/client.key';

START SLAVE;
Verify replica health:
SHOW SLAVE STATUS\GSlave_IO_Running: YesSlave_SQL_Running: YesSeconds_Behind_Master: should be 0 or small and decreasingLast_IO_ErrorandLast_SQL_Error: emptyMaster_SSL_Allowed: Yes
Verify read-only really blocks writes:
SHOW VARIABLES LIKE 'read_only';
SHOW VARIABLES LIKE 'super_read_only';
Then try a deliberate write test (it should fail):
CREATE DATABASE should_fail;Step 8: Point your application safely (writes to primary, optional reads to replica)
For most sites, keep this simple. Point your app at the primary for all reads and writes.
If you add read splitting later, do it carefully. Many CMS plugins assume read-after-write consistency, and replicas can lag.
A practical compromise is to keep the replica as standby only. Use it for read-only tooling (reporting, exports), or as a controlled fallback during maintenance.
If you run WordPress, keep the DB host set to the primary. If you need breathing room, reduce query pressure with Redis before you complicate your DB topology.
HostMyCode has a guide on setting up Redis object cache for WordPress, which often trims repeated query load without adding replication edge cases.
Step 9: Operational checks you should run weekly
Replication failures don’t always announce themselves. These checks take under a minute and catch most issues early.
Replica lag and status
sudo mysql -uroot -p -e "SHOW SLAVE STATUS\G" | egrep "Slave_IO_Running|Slave_SQL_Running|Seconds_Behind_Master|Last_IO_Error|Last_SQL_Error|Master_SSL_Allowed"Confirm replica stays read-only after reboot
sudo mysql -uroot -p -e "SHOW VARIABLES LIKE 'read_only'; SHOW VARIABLES LIKE 'super_read_only';"Binlog growth on primary
sudo mysql -uroot -p -e "SHOW BINARY LOGS;" | tailIf binlogs grow unusually fast, you may have a noisy workload or a replica that’s been disconnected too long.
Don’t “fix” it by deleting logs. Find the reason and address that.
Step 10: Backups that include a restore test (primary and replica)
Replication is not a backup. If someone drops a table on the primary, the replica will happily drop it too.
You still need backups, and you need proof you can restore them.
If you want a straightforward routine that includes restore testing, follow HostMyCode’s tutorial: set up automatic MySQL backups with tested restores.
Run it on the primary. Optionally run a second job on the replica for extra coverage.
Failover runbook: promote the replica without making things worse
This is the section to keep in your incident doc. The goal is simple: stop writes to the old primary, confirm the replica is caught up (as much as possible), then promote the replica to accept writes.
0) Decide if this is a failover or a switchover
- Switchover (planned): primary is healthy. You can stop the app cleanly and get zero or near-zero data loss.
- Failover (unplanned): primary is down or corrupted. You may accept some data loss depending on last replicated transaction.
1) Freeze application writes
Pick one method that matches your stack and execute it completely:
- Stop app containers/services.
- Put WordPress in maintenance mode (or block
wp-adminactions temporarily). - At the reverse proxy, return
503for write-heavy routes as a last resort.
2) If primary is reachable, lock it down to prevent split-brain
On db1 (primary), prevent new writes. This protects you if something reconnects unexpectedly.
sudo mysql -uroot -p -e "SET GLOBAL read_only=ON; SET GLOBAL super_read_only=ON;"If you can’t reach db1, assume it might return at any moment.
Fence it off from the app network with firewall rules until you’ve decided your next move.
3) Ensure the replica has applied everything it received
On db2:
sudo mysql -uroot -p -e "SHOW SLAVE STATUS\G" | egrep "Seconds_Behind_Master|Slave_SQL_Running|Last_SQL_Error"For a planned switchover, wait until Seconds_Behind_Master is 0 and stays there.
4) Stop replication and promote db2
On db2:
sudo mysql -uroot -pSTOP SLAVE;
RESET SLAVE ALL;
SET GLOBAL read_only=OFF;
SET GLOBAL super_read_only=OFF;
QUIT;Verify db2 accepts writes now:
sudo mysql -uroot -p -e "CREATE DATABASE failover_test; DROP DATABASE failover_test;"5) Repoint your application to the new primary
Preferred: update DNS for db-primary.example.com to point to db2. Set your TTL low (60–300 seconds) ahead of time so this doesn’t drag on.
Alternative: update your app config (ENV var, wp-config.php, Laravel .env) to the new DB host, then restart the app.
6) After the incident: rebuild the old primary as a replica (don’t “flip it back” blindly)
If db1 returns, don’t rush to make it primary again. Treat it as untrusted until you verify it.
In practice, rebuild db1 from db2 (now primary) with a fresh seed. Then set up replication in the opposite direction.
If you want fewer surprises during changes like this, basic CI and deployment hygiene helps.
HostMyCode has a walkthrough for running Gitea on a VPS and another for Woodpecker CI with Gitea.
Even a simple “deploy + health check” pipeline reduces mistakes when you’re operating under pressure.
Troubleshooting: the errors you’ll actually see
Replica shows: “Access denied for user 'repl'”
- Confirm the replication user host matches the replica IP:
'repl'@'10.10.0.12'. - Confirm password matches what you set in
CHANGE MASTER TO. - Confirm TLS requirement: if user is
REQUIRE SSL, ensureMASTER_SSL=1and cert paths are correct.
On db1:
sudo mysql -uroot -p -e "SHOW GRANTS FOR 'repl'@'10.10.0.12';"Replica shows: “Could not parse relay log event” or SQL thread stops
This commonly follows an unclean shutdown or a disk problem. Start by pulling the exact error text:
sudo mysql -uroot -p -e "SHOW SLAVE STATUS\G" | egrep "Last_SQL_Error|Last_IO_Error"If corruption looks likely, rebuild the replica from a clean seed.
Skipping events just to make the status turn green is how you end up with silent divergence.
Replication is running but lag keeps climbing
- Replica is underprovisioned: CPU, disk IOPS, or RAM pressure.
- Primary is write-heavy (batch jobs, imports).
- Long-running queries block apply on replica.
Quick checks on db2:
top
iostat -x 1 5
sudo mysql -uroot -p -e "SHOW PROCESSLIST;"
If you’re consistently CPU or I/O bound, move the database role to a larger plan or separate DB nodes.
A HostMyCode VPS with NVMe and enough RAM keeps replication practical; weak disks turn it into permanent lag.
Security checklist (quick but real)
- Replication port open only from replica IP (or private network only).
require_secure_transport=ONon primary if you can enforce TLS across clients.- Dedicated
repluser with onlyREPLICATION SLAVEprivilege. - Replica enforced
read_onlyandsuper_read_only. - Offsite backups with restore tests (replication is not a backup).
If you also run Nginx on the same VPS for a small stack, add brute-force protection at the edge. This guide on Fail2Ban for Nginx is a solid baseline to reduce credential stuffing before it hits your app.
Summary: what to document for your future self
- Primary and replica IPs/hostnames.
- Where TLS certs live:
/etc/mysql/tlsand who owns them. - The weekly health commands (copy/paste).
- The failover promotion runbook (freeze writes → fence old primary → promote replica → repoint app).
If you want this to work reliably, start with infrastructure that can keep up with binlogs and replay.
A HostMyCode VPS with adequate IOPS removes a whole category of replication “mystery” issues.
If you don’t want to own replication health checks, patching, and backup verification yourself, managed VPS hosting is the straightforward upgrade.
MariaDB replication behaves best on stable infrastructure: consistent CPU, NVMe storage, and predictable networking. If you’re adding redundancy for a revenue site, run the database on a HostMyCode VPS. If you’d like help with monitoring, backups, and routine security updates, consider managed VPS hosting.
FAQ
Do I need MariaDB replication if I already take backups?
Backups help you recover after data loss. Replication helps you keep the site online when a database server fails. They solve different problems, and production sites typically need both.
Can I use the replica for reads in WordPress?
You can, but be careful. Replication lag can break read-after-write behavior (login sessions, cart updates). Many sites get better results by adding Redis object caching first, then revisiting read splitting only if needed.
What’s the safest failover approach for small teams?
Manual promotion with a written runbook. Freeze app writes, fence the old primary, then promote the replica. Automatic failover without fencing can create split-brain and permanent data divergence.
How do I test that TLS is actually being used?
On the replica, SHOW SLAVE STATUS\G should report Master_SSL_Allowed: Yes. Also enforce REQUIRE SSL on the replication user and keep require_secure_transport=ON on the primary if your clients support it.
How often should I rebuild a replica?
Only when needed (corruption, repeated apply errors, or you can’t trust consistency). If you do rebuild, treat it like a procedure: fresh seed, new coordinates, then validate replication state and read-only enforcement.