
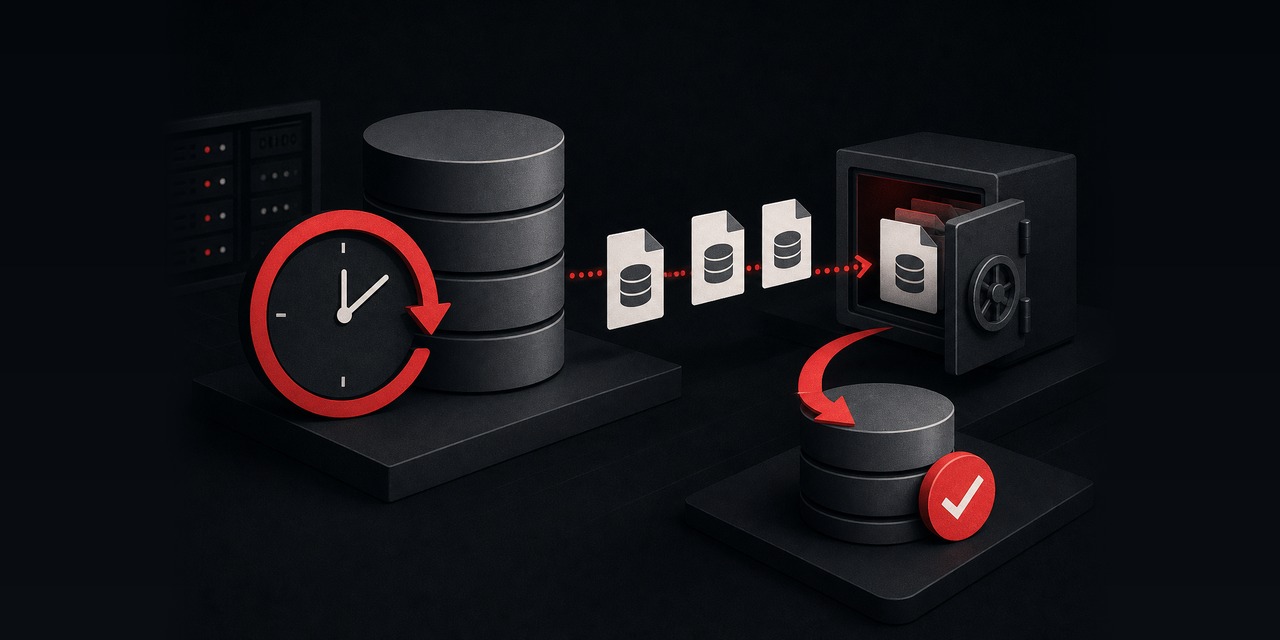
A database backup isn’t real until you’ve restored it. This walkthrough sets up automatic MySQL backups on a VPS.
You’ll create nightly dumps, gzip compression, retention cleanup, and offsite sync. You’ll also add a scheduled restore test that proves the dump actually imports.
The steps work on Ubuntu 24.04/26.04, Debian 12/13, AlmaLinux 9/10, and Rocky Linux 9/10. You’ll use systemd timers instead of cron for predictable scheduling and clean status checks. You’ll also get proper logging, so you can answer “did it run?” fast.
What you’ll build (and why it’s safer)
- Nightly logical backups using
mysqldumpwith consistent snapshots. - Compression (gzip) to reduce storage cost and transfer time.
- Retention (keep daily backups for N days) to prevent disk fill incidents.
- Offsite sync using
rsyncover SSH to a second server. - Tested restores: a scheduled restore into a throwaway database on the same server to validate integrity.
If you run production WordPress, Laravel, or any MySQL-backed app on a VPS, this is basic hygiene.
A HostMyCode VPS works well because you control storage, firewall rules, and where offsite copies land.
Prerequisites and assumptions
- Root or sudo access to the MySQL server.
- MySQL 8.0+ (or MariaDB 10.6+). Commands are compatible; where they differ, notes are included.
- Enough disk for at least 2–7 backups (size depends on your DB).
- An offsite target (another VPS, dedicated server, or storage box) reachable via SSH.
Tip: If your app and database share one node today, that’s fine. As load grows, plan to split MySQL out later.
HostMyCode also offers managed VPS hosting if you want help maintaining backup/restore routines and monitoring.
Step 1: Create a least-privilege MySQL backup user
Don’t put your MySQL root password in a script. Create a dedicated user that can read what a dump needs, and nothing more.
mysql -u root -pRun the following (adjust username as you like):
CREATE USER 'backup'@'localhost' IDENTIFIED BY 'REPLACE_WITH_STRONG_PASSWORD';

-- Minimum permissions for consistent dumps:
GRANT SELECT, SHOW VIEW, TRIGGER, EVENT, LOCK TABLES ON *.* TO 'backup'@'localhost';

-- For MySQL 8.0, allow reading performance schema metadata for some tools (safe):
GRANT SELECT ON performance_schema.* TO 'backup'@'localhost';

FLUSH PRIVILEGES;
Verify:
mysql -u backup -p -e "SHOW DATABASES;"Common mistake: Under-granting breaks dumps on views/triggers. Over-granting pushes you back to scripting root.
The grants above are a practical middle ground for most servers.
Step 2: Store credentials safely with mysql_config_editor
Avoid saving a password in plaintext. Use mysql_config_editor to create an encrypted login path. It writes to ~/.mylogin.cnf and enforces permissions.
As root (or a dedicated backup system user), run:
mysql_config_editor set \
  --login-path=backup \
  --host=localhost \
  --user=backup \
  --password
Verify the login path works (no password prompt):
mysql --login-path=backup -e "SELECT NOW();"Where it lives: /root/.mylogin.cnf (if you ran it as root). Permissions should be 600.
Step 3: Create backup directories and a config file
Local backups will live under /var/backups/mysql. Each run writes to a date-stamped folder.
You’ll also get a latest symlink, so you don’t have to hunt for filenames.
mkdir -p /var/backups/mysql
chmod 700 /var/backups/mysql
Create a simple config file for your script:
nano /etc/mysql-backup.conf# /etc/mysql-backup.conf
BACKUP_DIR="/var/backups/mysql"
RETENTION_DAYS="14"
COMPRESS="gzip"
# Offsite sync target (optional but recommended)
OFFSITE_ENABLED="yes"
OFFSITE_USER="backup"
OFFSITE_HOST="203.0.113.10"
OFFSITE_PATH="/srv/offsite/mysql-backups"
OFFSITE_SSH_PORT="22"
# Restore-test settings
RESTORE_TEST_ENABLED="yes"
RESTORE_TEST_DB="_restore_test"
Protect it:
chmod 600 /etc/mysql-backup.confStep 4: Install required packages
On Ubuntu/Debian:
apt update
apt install -y mysql-client gzip rsync openssh-client
On AlmaLinux/Rocky:
dnf install -y mysql gzip rsync openssh-clientsNote: On MariaDB-based systems, the client binaries may be mariadb and mariadb-dump. This guide uses mysqldump because it’s present on most installs.
Swap commands if your distro expects the MariaDB names.
Step 5: Write the backup script (dump + compress + retention)
Create the script:
nano /usr/local/sbin/mysql-backup.sh#!/usr/bin/env bash
set -euo pipefail
CONFIG_FILE="/etc/mysql-backup.conf"
if [[ ! -f "$CONFIG_FILE" ]]; then
echo "Missing config: $CONFIG_FILE" >&2
exit 1
fi
# shellcheck disable=SC1090
source "$CONFIG_FILE"
DATE="$(date +%F)"
TS="$(date +%F_%H%M%S)"
RUN_DIR="$BACKUP_DIR/$DATE"
LATEST_LINK="$BACKUP_DIR/latest"
mkdir -p "$RUN_DIR"
chmod 700 "$RUN_DIR"
# File names
DUMP_FILE="$RUN_DIR/mysql-all-$TS.sql"
DUMP_FILE_COMPRESSED="$DUMP_FILE.gz"
echo "[mysql-backup] Starting dump at $(date -Is)"
# Consistent dump for InnoDB-heavy workloads
# --single-transaction avoids global locks for InnoDB tables.
# --routines/--triggers/--events keep app behavior intact.
# --set-gtid-purged=OFF avoids surprises on servers that don't use GTID.
mysqldump \
--login-path=backup \
--all-databases \
--single-transaction \
--quick \
--routines \
--triggers \
--events \
--hex-blob \
--set-gtid-purged=OFF \
--default-character-set=utf8mb4 \
> "$DUMP_FILE"
# Basic sanity check: file exists and isn't empty
if [[ ! -s "$DUMP_FILE" ]]; then
echo "[mysql-backup] Dump file is empty: $DUMP_FILE" >&2
exit 2
fi
if [[ "${COMPRESS}" == "gzip" ]]; then
gzip -f "$DUMP_FILE"
FINAL_FILE="$DUMP_FILE_COMPRESSED"
else
FINAL_FILE="$DUMP_FILE"
fi
# Write a checksum for quick corruption detection
sha256sum "$FINAL_FILE" > "$FINAL_FILE.sha256"
# Update latest symlink
ln -sfn "$RUN_DIR" "$LATEST_LINK"
echo "[mysql-backup] Backup created: $FINAL_FILE"
echo "[mysql-backup] Enforcing retention: keep ${RETENTION_DAYS} days"
find "$BACKUP_DIR" -mindepth 1 -maxdepth 1 -type d -name "20*" -mtime "+${RETENTION_DAYS}" -print -exec rm -rf {} \;
echo "[mysql-backup] Done at $(date -Is)"Make it executable:
chmod 700 /usr/local/sbin/mysql-backup.shRun it once manually:
/usr/local/sbin/mysql-backup.sh
ls -lah /var/backups/mysql/latest
Verify the dump looks reasonable:
zcat /var/backups/mysql/latest/*.sql.gz | headCommon mistakes
- Skipping
--single-transactionon InnoDB (you can capture a mismatched snapshot under write load). - Forgetting routines/events (the restore “works,” then scheduled tasks quietly disappear).
- Setting retention too short (you notice corruption a week later, but only kept 3 days).
Step 6: Add offsite sync with rsync over SSH
Local backups help with operator error. Offsite backups help when a disk dies, a server is compromised, or your provider has a bad day.
Here you’ll sync /var/backups/mysql to a second server you control.
On the offsite server, create a backup user and directory:
sudo useradd -m -s /bin/bash backup
sudo mkdir -p /srv/offsite/mysql-backups
sudo chown -R backup:backup /srv/offsite/mysql-backups
sudo chmod 700 /srv/offsite/mysql-backups
On the MySQL server, create an SSH key for root (or your backup user):
ssh-keygen -t ed25519 -a 64 -f /root/.ssh/mysql-offsite -N ""Install the public key on the offsite server:
ssh-copy-id -i /root/.ssh/mysql-offsite.pub -p 22 backup@203.0.113.10Now extend the backup script to sync after the backup completes. Edit /usr/local/sbin/mysql-backup.sh and add this near the end.
You can sync after retention too. Syncing before retention means offsite gets new backups even if cleanup fails.
if [[ "${OFFSITE_ENABLED}" == "yes" ]]; then
  echo "[mysql-backup] Offsite sync enabled"
  RSYNC_SSH="ssh -i /root/.ssh/mysql-offsite -p ${OFFSITE_SSH_PORT} -o BatchMode=yes -o StrictHostKeyChecking=accept-new"

  rsync -a --delete \
    -e "$RSYNC_SSH" \
    "$BACKUP_DIR/" \
    "${OFFSITE_USER}@${OFFSITE_HOST}:${OFFSITE_PATH}/"

  echo "[mysql-backup] Offsite sync completed"
fi
Verify:
ssh -i /root/.ssh/mysql-offsite backup@203.0.113.10 "ls -lah /srv/offsite/mysql-backups/latest"Offsite sizing tip: If your database is 10 GB uncompressed, expect 1–4 GB compressed depending on data type. Leave headroom for growth and longer retention.
Step 7: Add a scripted restore test (the step most people skip)
A dump file can exist and still be useless. It might be truncated or corrupted. It might also be missing objects.
Imports can fail due to SQL mode differences or permissions. A scheduled restore test catches these problems early.
Create the restore test script:
nano /usr/local/sbin/mysql-restore-test.sh#!/usr/bin/env bash
set -euo pipefail
CONFIG_FILE="/etc/mysql-backup.conf"
source "$CONFIG_FILE"
LATEST_DIR="$BACKUP_DIR/latest"
if [[ "${RESTORE_TEST_ENABLED}" != "yes" ]]; then
echo "[mysql-restore-test] Disabled"
exit 0
fi
if [[ ! -d "$LATEST_DIR" ]]; then
echo "[mysql-restore-test] Missing latest backup dir: $LATEST_DIR" >&2
exit 1
fi
DUMP_GZ="$(ls -1 "$LATEST_DIR"/*.sql.gz 2>/dev/null | tail -n 1 || true)"
DUMP_SQL="$(ls -1 "$LATEST_DIR"/*.sql 2>/dev/null | tail -n 1 || true)"
if [[ -n "$DUMP_GZ" ]]; then
DUMP_FILE="$DUMP_GZ"
READER="zcat"
elif [[ -n "$DUMP_SQL" ]]; then
DUMP_FILE="$DUMP_SQL"
READER="cat"
else
echo "[mysql-restore-test] No dump found in $LATEST_DIR" >&2
exit 2
fi
echo "[mysql-restore-test] Using dump: $DUMP_FILE"
# Drop and recreate the test DB to ensure a clean import
mysql --login-path=backup -e "DROP DATABASE IF EXISTS ${RESTORE_TEST_DB}; CREATE DATABASE ${RESTORE_TEST_DB};"
# Import into the test DB.
# We can't import --all-databases into a single DB directly, so we filter:
# - Remove CREATE DATABASE/USE statements
# - Skip mysql/performance_schema/sys/system databases
# For multi-DB servers, consider switching to per-database dumps.
$READER "$DUMP_FILE" | \
awk '
BEGIN { skip=0 }
/^-- Current Database:/ { skip=0 }
/^CREATE DATABASE/ { next }
/^USE / { next }
/^\/\*!40100 DEFAULT CHARACTER SET/ { next }
/^--/ { print; next }
{ print }
' | \
mysql --login-path=backup "${RESTORE_TEST_DB}"
# Smoke checks: ensure the DB exists and has tables
TABLES_COUNT=$(mysql --login-path=backup -N -e "SELECT COUNT(*) FROM information_schema.tables WHERE table_schema='${RESTORE_TEST_DB}';")
if [[ "$TABLES_COUNT" -lt 1 ]]; then
echo "[mysql-restore-test] Restore test failed: no tables imported" >&2
exit 3
fi
echo "[mysql-restore-test] Restore test OK: ${TABLES_COUNT} tables in ${RESTORE_TEST_DB}"
# Clean up (optional). Comment out if you want to keep for inspection.
mysql --login-path=backup -e "DROP DATABASE IF EXISTS ${RESTORE_TEST_DB};"
echo "[mysql-restore-test] Cleanup done"Make it executable:
chmod 700 /usr/local/sbin/mysql-restore-test.shRun it manually:
/usr/local/sbin/mysql-restore-test.shImportant limitation: The dump uses --all-databases. Restoring into a single test database needs filtering. It also won’t cover every edge case on a complex multi-DB host.
If you run many customer databases, switch to “one dump per DB.” Then test-restore one or two critical databases.
On a single-app VPS, this usually catches truncation and obvious import failures.
Step 8: Schedule everything with systemd timers (with logs)
systemd timers make the schedule explicit. They also make the audit trail easy to read.
You’ll create two services and two timers. One runs the nightly backup. The other runs the restore test shortly after.
Create the backup service
nano /etc/systemd/system/mysql-backup.service[Unit]
Description=Nightly MySQL backup
Wants=network-online.target
After=network-online.target mysql.service mariadb.service
[Service]
Type=oneshot
ExecStart=/usr/local/sbin/mysql-backup.sh
Nice=10
IOSchedulingClass=best-effort
IOSchedulingPriority=7Create the backup timer
nano /etc/systemd/system/mysql-backup.timer[Unit]
Description=Run MySQL backup nightly
[Timer]
OnCalendar=*-*-* 02:15:00
Persistent=true
RandomizedDelaySec=10m
[Install]
WantedBy=timers.targetCreate the restore-test service
nano /etc/systemd/system/mysql-restore-test.service[Unit]
Description=Test restore of latest MySQL dump
Wants=network-online.target
After=network-online.target mysql.service mariadb.service
[Service]
Type=oneshot
ExecStart=/usr/local/sbin/mysql-restore-test.sh
Nice=10
IOSchedulingClass=best-effort
IOSchedulingPriority=7Create the restore-test timer
nano /etc/systemd/system/mysql-restore-test.timer[Unit]
Description=Run MySQL restore test nightly
[Timer]
OnCalendar=*-*-* 03:05:00
Persistent=true
RandomizedDelaySec=15m
[Install]
WantedBy=timers.targetReload systemd and enable timers:
systemctl daemon-reload
systemctl enable --now mysql-backup.timer mysql-restore-test.timer
Verify scheduling:
systemctl list-timers --all | grep -E "mysql-backup|mysql-restore"Check the most recent logs:
journalctl -u mysql-backup.service -n 100 --no-pager
journalctl -u mysql-restore-test.service -n 100 --no-pager
Quick diagnostic: If timers don’t fire, check the system clock and NTP:
timedatectl statusStep 9: Confirm you can restore for real (a realistic drill)
The nightly restore test is a safety net. It is not a full disaster-recovery exercise.
Run a real restore drill at least once. Do it on a staging VPS or during a quiet maintenance window.
- Provision a small staging server (or a temporary VM) and install MySQL.
- Copy one backup file (
.sql.gz) and its.sha256. - Verify checksum, then import.
Example:
# On staging server
sha256sum -c mysql-all-2026-xx-xx_021500.sql.gz.sha256

zcat mysql-all-2026-xx-xx_021500.sql.gz | mysql -u root -p
What you’re looking for: no SQL errors, expected databases present, the application boots, and key pages load.
For WordPress, confirm you can log in and posts render correctly.
For WordPress-specific operational checks, keep these guides handy:
- WordPress file permissions fix on a VPS (restores can change ownership/permissions).
- Fix WordPress stuck in maintenance mode (common after interrupted updates).
Hardening and operational tweaks that pay off
Once the pipeline runs, lock it down. Backups are valuable data, and they often get overlooked.
- Restrict backup file access: keep
/var/backups/mysqlat700, owned by root. - Limit SSH key scope on offsite server: use
authorized_keysrestrictions (command=, from=) for the rsync key if you want to lock it down. - Monitor disk usage: if retention cleanup fails, disks fill quickly. Add an alert to your monitoring.
- Block brute force on SSH/Nginx: if this VPS is internet-facing, add basic protection. See Set up Fail2ban for Nginx on Ubuntu VPS.
If you also run reverse proxies and monitoring on the same host, the same habits apply.
This HostMyCode guide follows a similar “production hygiene” checklist for another stack: Deploy Grafana on a VPS with Docker, TLS, and backups.
Common restore failures (and how to fix them fast)
- “Access denied” during dump: re-check user grants. Views/routines often need
SHOW VIEWandTRIGGER. - Dump runs but restores fail on DEFINER: if you use views or stored routines created by a different MySQL user, you may need to add
--skip-definer(MariaDB) or recreate definers post-restore. For many web apps, avoiding definers is simplest. - “MySQL server has gone away” on import: increase
max_allowed_packettemporarily and ensure disk space. For Nginx upload-related errors, the fix is different; see Nginx 413 Request Entity Too Large fix. - Huge DB, dump too slow: move to per-database dumps, or schedule during low-write windows. If downtime tolerance is near-zero, you’re in replica/physical-backup territory.
Summary checklist (print this)
- Backup user created with least privileges.
mysql_config_editorlogin path works without prompts.- Nightly dump runs, compresses, and writes checksums.
- Retention prunes old backup directories.
- Offsite sync completes and
latestexists offsite. - Restore test imports and validates table count.
- You’ve run one full restore drill on a separate server.
If you need predictable storage performance and full root access for backup automation, run this on a HostMyCode VPS. If you’d rather have the backup schedule, retention, and restore checks maintained for you, consider managed VPS hosting from HostMyCode.
FAQ: automatic MySQL backups
How often should I run automatic MySQL backups?
Nightly is a solid baseline for most sites. If you process orders or have frequent writes, add a second run (for example every 6 hours) and keep longer retention offsite.
Should I use cron instead of systemd timers?
Cron is fine, but systemd timers make failures easier to audit with journalctl and support Persistent=true, which runs missed jobs after reboot.
Is mysqldump enough for large databases?
For many VPS-hosted apps, yes. If restores take too long or dumps don’t fit your window, switch to per-database dumps, replicas, or physical backup methods.
What’s the easiest way to know my backups are usable?
Automate a restore test and watch its exit code in logs. If you haven’t restored it, you’re guessing.
Next steps
Once your database backups are boring and reliable, apply the same discipline to the rest of the stack. Back up configs, app uploads (like wp-content/uploads), and secrets.
If you’re outgrowing a single node, consider splitting services or moving to a dedicated database tier. HostMyCode can help you choose between a VPS and dedicated servers based on your dataset size and recovery goals.