
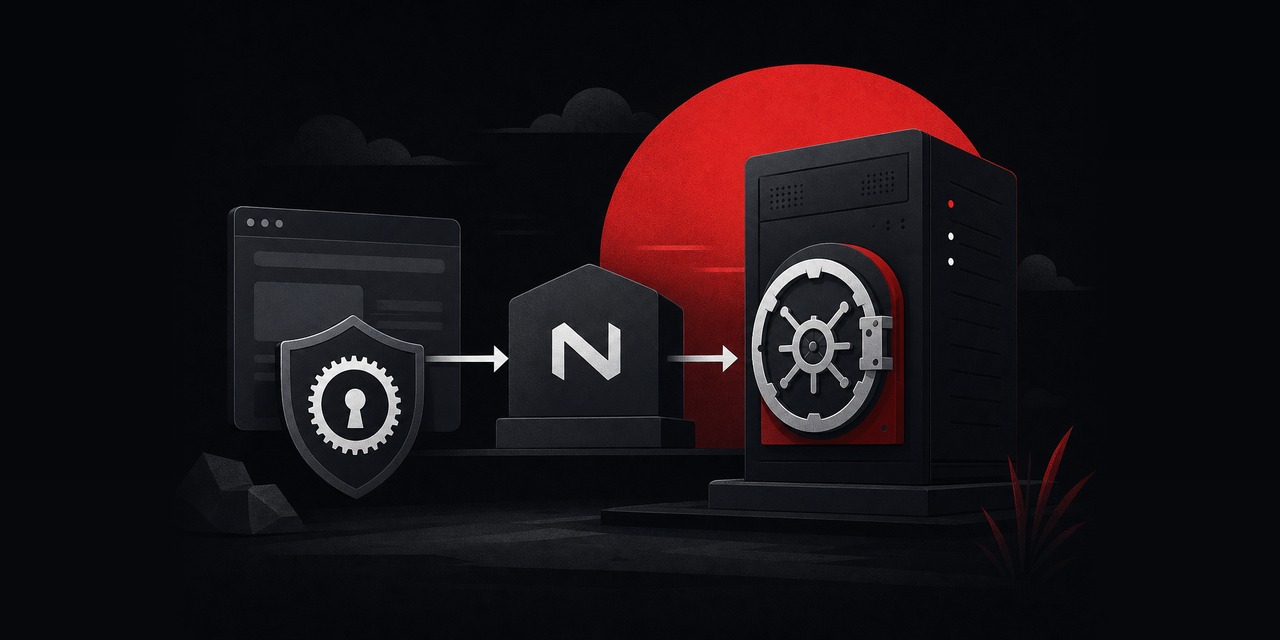
Password management failures are rarely dramatic. Someone leaves, a shared spreadsheet sticks around, and weeks later you can’t tell who still has access. If you want Bitwarden-style clients without putting your vault inside someone else’s SaaS boundary, you can install Vaultwarden on a VPS and keep the data on infrastructure you control.
This is an open-source spotlight with a deployment plan you can actually run. It uses Docker Compose, Nginx as a reverse proxy with HTTPS, locked-down admin access, restorable backups, and an update routine that won’t eat your weekend.
What Vaultwarden is (and why teams choose it)
Vaultwarden is a community-maintained, self-hosted server that implements the Bitwarden API. That means the official Bitwarden apps (desktop, mobile, browser extensions) can connect to it.
The project is open-source (AGPLv3). Teams choose it because it’s lightweight, runs well on modest VPS plans, and avoids the heavier official Bitwarden server stack.
Vaultwarden fits best if:
- You want Bitwarden-compatible clients but prefer to self-host.
- Your team needs shared vaults/organizations, collections, and basic access control.
- You’re comfortable operating one small web service plus a database file (SQLite) or a separate DB (PostgreSQL/MySQL).
It’s not magic. You still own patching, TLS, backups, and day-to-day discipline.
The upside is simple: your vault lives where you decide it lives.
Vaultwarden vs hosted Bitwarden (and other proprietary options)
Hosted password managers are convenient. They handle uptime, patching, and often the compliance paperwork.
The trade-off is dependency you can’t fully control.
Here’s what usually matters in practice:
- Control: With Vaultwarden, the vault database and attachments sit on your server. You choose the region, retention, and backup strategy.
- Cost predictability: A small VPS can serve a team without per-seat pricing surprises, especially for internal use.
- Operational risk: Misconfigured TLS, an exposed admin panel, or skipped updates can hurt you. Hosted services reduce that risk by default.
- Features: Hosted plans may include enterprise SSO, reporting, vendor support, and integrations. Vaultwarden covers the core workflow well, but confirm the few features your organization relies on.
If your priority is “someone else owns availability and audits,” hosted may still be the right call.
If your priority is “we decide where secrets live,” Vaultwarden is a practical middle ground.
Plan the VPS: sizing, OS, and where HostMyCode fits
Vaultwarden doesn’t need much horsepower, but it is security-critical. Don’t drop it onto a crowded VPS that also runs side projects.
Aim for stable I/O, predictable RAM, and a clean update path.
- Recommended starting point: 1 vCPU, 2 GB RAM, NVMe storage.
- Storage: Start with 20–40 GB. Attachments and backups grow quietly.
- OS: Ubuntu 24.04 LTS or Debian 12 are common choices in 2026 for long-term patching.
- Network: Public HTTPS (443) to the vault; SSH locked down to your admin IP or VPN.
If you want a clean VPS for a “one service done right” setup, a HostMyCode VPS is a solid baseline.
If you’d rather not manage updates and security plumbing yourself, managed VPS hosting is often a safer fit for a password vault. Neglect has a real cost here.
Architecture: Docker Compose + Nginx TLS + minimal exposure
A sensible default keeps Vaultwarden behind a reverse proxy. Nginx terminates TLS and Vaultwarden writes data to persistent storage.
- Vaultwarden container bound to localhost only (no direct public port).
- Nginx as the only internet-facing service for the vault hostname.
- Let’s Encrypt certificates issued for
vault.example.com. - Backups that capture the Vaultwarden data directory and are copied off-server.
This setup is easy to audit. From the outside, port scans should show only 80/443.
Deploy: a Compose file that’s boring (in a good way)
Most production mistakes come from improvised paths and permissions. Pick one directory layout and stick to it.
The examples below assume:
- Server user:
rootor a sudo user - App directory:
/opt/vaultwarden - DNS:
A/AAAArecord forvault.example.compointed to your VPS
sudo mkdir -p /opt/vaultwarden/{data,backups}
cd /opt/vaultwarden
Example docker-compose.yml using the official Vaultwarden image on Docker Hub. Keep the tag strategy conservative (see the updates section below).
services:
  vaultwarden:
    image: vaultwarden/server:latest
    container_name: vaultwarden
    restart: unless-stopped
    environment:
      # Set the public URL clients will use
      DOMAIN: "https://vault.example.com"

      # Use file-based persistence (default SQLite). Good for small teams.
      # Data lives in /data inside the container.

      # Tighten what the server exposes.
      SIGNUPS_ALLOWED: "false"
      INVITATIONS_ALLOWED: "true"

      # Optional but recommended: make logs useful without being noisy.
      LOG_LEVEL: "info"

      # WebSocket notifications (needed for some clients)
      WEBSOCKET_ENABLED: "true"

      # Admin token (generate a long random string; see below)
      ADMIN_TOKEN: "REPLACE_WITH_LONG_RANDOM_TOKEN"

    volumes:
      - ./data:/data
    ports:
      # Bind only to localhost; Nginx proxies to it
      - "127.0.0.1:8080:80"
    healthcheck:
      test: ["CMD", "wget", "-qO-", "http://127.0.0.1:80/alive"]
      interval: 30s
      timeout: 5s
      retries: 5
Generate the admin token on the server. Don’t reuse a password you’ve typed before.
openssl rand -base64 48
Then start the service:
docker compose up -d
docker compose ps
docker logs --tail=50 vaultwarden
If Docker itself isn’t installed yet, follow a minimal install for your distro. Then verify:
docker --version
docker compose version
If you run multiple Compose stacks on one VPS, keep each app under /opt/<app>. Keep volumes predictable, and avoid creative networking.
Boring setups are easier to secure and easier to recover.
Reverse proxy and HTTPS with Nginx (including WebSocket)
Your Vaultwarden URL should always be HTTPS. A password vault shouldn’t see cleartext traffic, even briefly.
Nginx plus Let’s Encrypt is the standard way to do this cleanly.
If you already have an Nginx hardening baseline, use it. If you want a quick refresher on proxy patterns, HostMyCode’s Nginx reverse-proxy examples in our Umami behind Nginx write-up follow the same idea. Bind the app to localhost and expose only Nginx.
Install Nginx and Certbot (Ubuntu/Debian):
sudo apt update
sudo apt install -y nginx certbot python3-certbot-nginx
Create an Nginx server block at /etc/nginx/sites-available/vaultwarden.conf:
server {
    listen 80;
    listen [::]:80;
    server_name vault.example.com;

    location /.well-known/acme-challenge/ {
        root /var/www/html;
    }

    location / {
        return 301 https://$host$request_uri;
    }
}
Enable it and reload:
sudo ln -s /etc/nginx/sites-available/vaultwarden.conf /etc/nginx/sites-enabled/vaultwarden.conf
sudo nginx -t
sudo systemctl reload nginx
Issue a certificate:
sudo certbot --nginx -d vault.example.com
Now replace the HTTPS vhost content. Certbot may create one automatically.
Use a config that supports the main UI plus WebSocket notifications:
server {
    listen 443 ssl http2;
    listen [::]:443 ssl http2;
    server_name vault.example.com;

    ssl_certificate /etc/letsencrypt/live/vault.example.com/fullchain.pem;
    ssl_certificate_key /etc/letsencrypt/live/vault.example.com/privkey.pem;

    # Basic hardening headers (keep them conservative to avoid breaking clients)
    add_header X-Content-Type-Options nosniff always;
    add_header X-Frame-Options SAMEORIGIN always;
    add_header Referrer-Policy no-referrer always;

    client_max_body_size 50m;

    # Main app
    location / {
        proxy_pass http://127.0.0.1:8080;
        proxy_set_header Host $host;
        proxy_set_header X-Real-IP $remote_addr;
        proxy_set_header X-Forwarded-For $proxy_add_x_forwarded_for;
        proxy_set_header X-Forwarded-Proto $scheme;
    }

    # WebSocket endpoint
    location /notifications/hub {
        proxy_pass http://127.0.0.1:8080;
        proxy_http_version 1.1;
        proxy_set_header Upgrade $http_upgrade;
        proxy_set_header Connection "upgrade";
        proxy_set_header Host $host;
        proxy_set_header X-Forwarded-Proto $scheme;
    }
}
Reload Nginx:
sudo nginx -t
sudo systemctl reload nginx
Two quick diagnostics that save time:
- If you see
502 Bad Gateway, confirm the container is listening on127.0.0.1:8080. Also confirm Nginx proxies to the same address. HostMyCode’s Nginx 502 guide covers the usual culprits. - If you hit upload errors for attachments, bump
client_max_body_sizeand confirm Nginx reloaded.
Admin hardening: protect /admin like it matters (because it does)
Vaultwarden’s admin panel can change everything quickly. Treat it like a control plane.
Keep access narrow and deliberate.
Start with the basics:
- Disable public signups (
SIGNUPS_ALLOWED=false) and invite users on purpose. - Use a long ADMIN_TOKEN. Don’t paste it into chat. Store it somewhere appropriate.
- Restrict admin access at Nginx so only your office/VPN IP can reach it.
Example: restrict /admin to a single admin IP in the HTTPS server block:
location ^~ /admin {
    allow 203.0.113.10;
    deny all;

    proxy_pass http://127.0.0.1:8080;
    proxy_set_header Host $host;
    proxy_set_header X-Real-IP $remote_addr;
    proxy_set_header X-Forwarded-For $proxy_add_x_forwarded_for;
    proxy_set_header X-Forwarded-Proto $scheme;
}
If you don’t have a stable admin IP, put admin access behind a VPN or add HTTP basic auth.
You can also use fail2ban with Nginx to cut down brute-force noise. Use the same approach as in our fail2ban Nginx tutorial.
Data and storage choices: SQLite vs PostgreSQL
Vaultwarden defaults to SQLite. It’s stored inside the mapped /opt/vaultwarden/data directory.
For many small teams, SQLite is ideal. You get fewer moving parts, fewer credentials to manage, and solid performance on NVMe.
Consider PostgreSQL if:
- You have many users and heavier activity, and you want better database visibility.
- You already operate PostgreSQL with proper backups and monitoring.
- You want a cleaner separation between app and data for future migrations.
If you go that route, keep PostgreSQL on the same VPS unless you have a clear reason not to. A networked database adds latency and creates another surface area to secure.
If you need a baseline for Postgres, HostMyCode’s PostgreSQL secure install guide is a solid checklist.
Backups that you can actually restore
Assume two things: someone will eventually delete the wrong item, and disks eventually fail. Also assume your first restore will happen at the worst time.
Your backups must live somewhere other than the VPS.
With SQLite, the minimum viable backup is the full /opt/vaultwarden/data directory. Capture it consistently.
The simplest approach is to stop the container briefly, archive the data directory, start it again, then copy the archive off-server.
Example backup script at /opt/vaultwarden/backup.sh:
#!/usr/bin/env bash
set -euo pipefail

APP_DIR="/opt/vaultwarden"
TS="$(date -u +%Y%m%dT%H%M%SZ)"
OUT="${APP_DIR}/backups/vaultwarden-${TS}.tar.gz"

cd "$APP_DIR"

docker compose stop vaultwarden

tar -czf "$OUT" data/

docker compose start vaultwarden

echo "Created $OUT"
Make it executable and run it once:
sudo chmod +x /opt/vaultwarden/backup.sh
sudo /opt/vaultwarden/backup.sh
ls -lh /opt/vaultwarden/backups/
Then automate it via cron (daily is reasonable for most teams):
sudo crontab -e
15 2 * * * /opt/vaultwarden/backup.sh >/var/log/vaultwarden-backup.log 2>&1
Two backup details that matter:
- Offsite copy: A tarball on the same disk is not a backup. Copy it to another server, a different VPS, or object storage. If you already use Borg or Restic, point it at
/opt/vaultwarden. - Restore test: Once per quarter, restore into a throwaway VM and confirm you can log in. If you’ve never restored it, you don’t know what you have.
Updating Vaultwarden safely (and keeping risk low)
Password managers deserve a cautious update process. Update often enough to pick up security fixes, but keep changes controlled.
Don’t auto-update containers blindly. Keep a working backup nearby so you can roll back if needed.
A reasonable routine:
- Take a fresh backup.
- Pull the new image.
- Restart the container.
- Check logs and do a real login test from a client.
cd /opt/vaultwarden
sudo /opt/vaultwarden/backup.sh

docker compose pull

docker compose up -d

docker logs --tail=100 vaultwarden
If you want tighter control, pin the image tag to a specific version instead of using latest. That avoids surprise changes. It also means you must bump the tag yourself.
Either way, read the project’s release notes before major upgrades. Watch for database or config changes.
Operational checks you’ll be glad you did
After you install Vaultwarden on a VPS and put it in front of real users, run a few quick checks. They can prevent painful cleanup later.
- Confirm HTTPS everywhere: Visit
http://vault.example.comand ensure it redirects to HTTPS. - Make sure only Nginx is exposed: From outside, you should not see port 8080 or any Vaultwarden port open.
- Log review: Scan
docker logs vaultwardenweekly. It’s a simple way to catch client sync errors or repeated login failures. - Certificate renewal: Certbot sets up timers by default on most systems. Verify with
systemctl list-timers | grep certbot. - Resource watch: RAM spikes often come from lots of attachments or aggressive sync. Disk growth is usually attachments + backups. Don’t let backups fill the same disk they’re meant to protect.
Common pitfalls (and quick fixes)
- Clients can’t connect: Check
DOMAINis exactly your HTTPS URL. Small mismatches can cause strange client behavior. - WebSocket notifications broken: Confirm your Nginx
/notifications/hubblock includesUpgradeandConnectionheaders. - Accidentally enabled open signups: Set
SIGNUPS_ALLOWED=falseand restart the container. - Admin page exposed to the internet: Add Nginx IP allow/deny rules (or require VPN), then reload Nginx.
- Backups are huge: Add retention (delete older archives) and move backups off-server. A simple policy is “keep 14 daily + 8 weekly.”
Where Vaultwarden fits in a real hosting stack
Most teams end up with three distinct tiers of self-hosting:
- Public web tier: marketing sites, apps, APIs
- Internal tooling: analytics, wikis, automation, chat/support
- Security-critical services: password vaults, SSO, private DNS/VPN
Vaultwarden belongs in the last tier.
The building blocks look familiar if you already run internal services: reverse proxy, TLS, and predictable backups. HostMyCode’s Grafana Docker + TLS post and our Outline wiki deployment use the same general posture.
The difference here is stricter admin controls and more disciplined restore testing.
Summary: self-hosting a Bitwarden-compatible vault, done carefully
If you want a lightweight, Bitwarden-compatible vault without a SaaS dependency, Vaultwarden is a practical option in 2026.
Keep the setup simple. Use Compose for deployment and Nginx for TLS and routing.
Lock down admin access. Copy backups off-server, and run regular restore tests.
When you’re ready to run it on stable infrastructure, start with a HostMyCode VPS sized for predictable I/O. Scale up if attachments or team size grows.
If you prefer help keeping the base server patched and monitored, managed VPS hosting is the lower-stress choice for security-critical services.
If Vaultwarden is becoming part of your day-to-day security workflow, host it like production. A HostMyCode VPS gives you predictable performance and full control, while managed VPS hosting keeps the OS and core services patched and maintained without drifting on reliability.
FAQ
Is Vaultwarden officially Bitwarden?
No. Vaultwarden is a separate open-source project that implements the Bitwarden client API so the official apps can connect to it. For many teams, that compatibility is the point.
Can I use SQLite for production?
Yes, for small-to-mid teams it’s commonly used. Keep the database on fast storage, take consistent backups, and don’t co-host noisy workloads on the same VPS.
Should I expose Vaultwarden directly, or only via Nginx?
Prefer Nginx (or another reverse proxy) so you can enforce HTTPS, headers, IP allowlists for /admin, and consistent logging. Bind Vaultwarden to 127.0.0.1 so it’s not reachable from the public internet.
What’s the simplest reliable backup?
Stop the container, archive /opt/vaultwarden/data, start the container, then copy the archive off-server. Then perform a restore test on a separate machine on a schedule.
How often should I update Vaultwarden?
For a password vault, monthly is a reasonable cadence for many teams, with faster updates if the project publishes a security fix. Always take a backup first and verify client logins after the update.